 A leaky faucet can be problematic. The constant dripping sound can be irritating, not to mention that it leads to wasted water and a higher water bill. Fortunately, there are simple ways that you can fix this problem without needing to hire a plumber.
But before we get to how to fix your leaky faucet, let’s understand what causes a faucet to leak.
Faucets use a cartridge or inner stem with a rubber stopper or seal to regulate the flow of water. If the seal or rubber stopper does not fit properly, your faucet is going to leak.
A couple of reasons that can cause the rubber stopper or seal to stop working properly are corrosion, foreign materials, and wear and tear. Mineral buildup can cause your faucet to leak, but a deep clean can help remove the buildup and get your faucet to work as good as new.
Corrosion is another problem. If some of the inside components are corroded or rusted, this can cause the faucet to leak. In such a situation, you will need to replace the entire faucet. You may attempt to do some repairs, but they more cost more than getting a new faucet.
A damaged stopper or seal can also lead to a leaky faucet. In this case, you would need to replace the stopper or seal.
Now that you know what causes a leaky faucet let’s look at how you can fix it.
Tools you will need
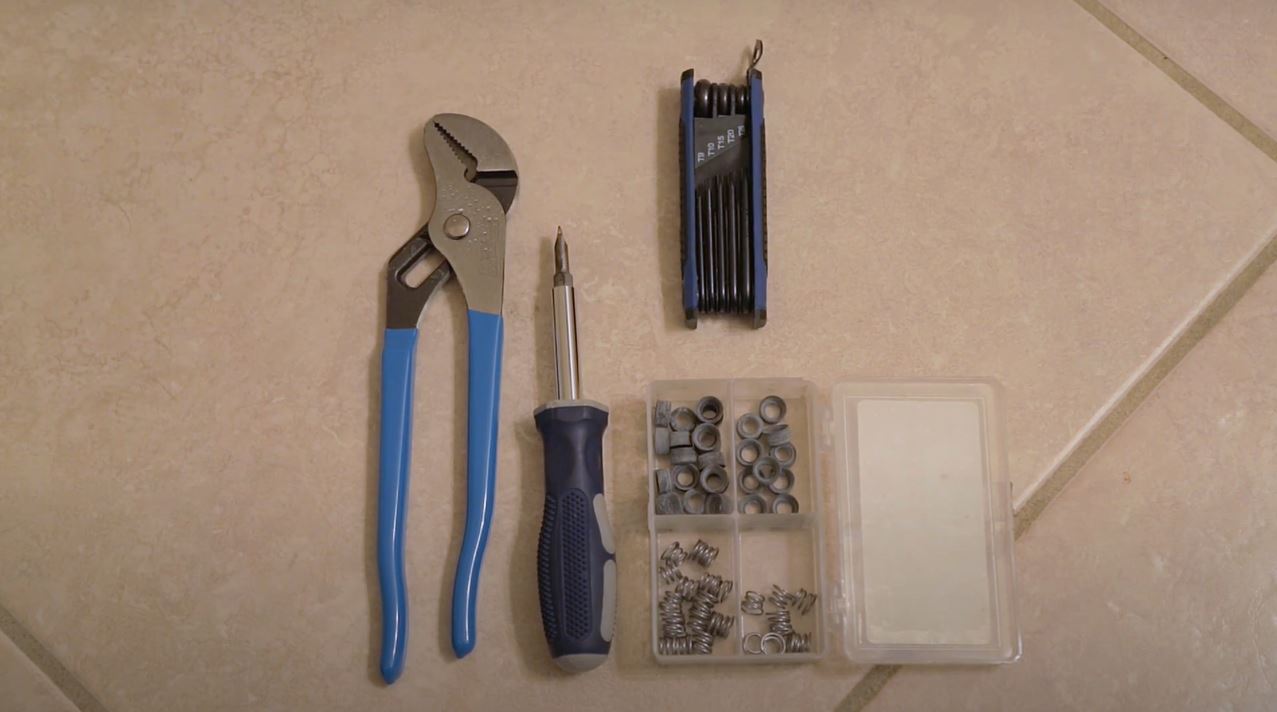
First things first, you need some tools to get the job done. This may include a wrench, pliers, screwdrivers, white vinegar or baking soda, scouring pad, sealers, and washers.
Step 1:
Turn off the water. To avoid flooding your home, the first thing you need to do before you disassemble your faucet is to turn off the water. Some faucets have shutoff valves that allow you to do this. If yours don’t have these valves, you’ll need to shut off the main water supply.
Step 2:
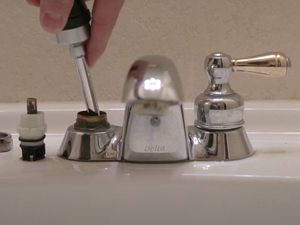
The next step is to remove the faucet handles. You’ll need a screwdriver to do this. Since faucets are different, check your instruction manual on how you can about doing it.
Just make sure that you don’t lose any screws or parts once you are done.
Step 3:
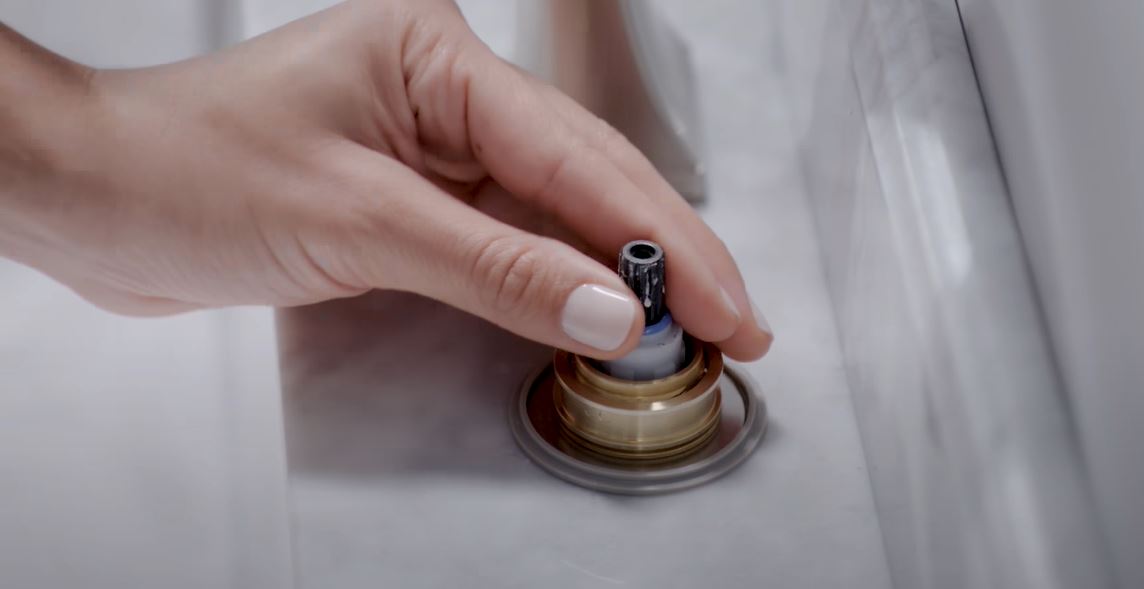
Remove the cartridge or inner stem. Check your faucet manual to see how it’s done since different faucets have different mechanisms. Once you have removed this component, inspect it carefully for dirt or damage.
Step 4:
If any of the parts are damaged or old, you will need to replace them with new ones. It is advisable to replace removable parts that have seen better days to improve the performance of your faucet.
These parts are available, and they come in kits. If you are replacing a cartridge, for example, you can get a kit that also comes with a replaceable seal. It is more cost-effective to buy a kit than to buy the components separately.
Step 5:
The next is to inspect the valves. If they have mineral buildup, grease, or dirt, use white vinegar or baking soda to clean them. Make a paste with baking soda using water and use your scouring pad to scrub the valves or simply pour some white vinegar on the valves and scrub off the dirt or buildup. Then rinse the valves with hot or cold water.
If you don’t plan on replacing the old cartridge, clean it with a cleaning agent of your choice before placing it back.
Step 6:
Once you are satisfied that all the components are clean, reassemble the faucet. Make sure that you put the components in the right place and correctly. Failure to do this may cause your faucet to work improperly.
Once you are done reassembling the faucet, test it to ensure that it’s working properly. If it’s not, you may need to disassemble it again to see what component is placed incorrectly.
When to replace a faucet
Over time, faucets deteriorate and need replacing. If your faucet is old, it may be time to replace it with another one. You may consider getting a better faucet, particularly if you realize that it’s hard to get components for your old model.
Traditional faucets are becoming obsolete, and if you have one of these, it might be time for a change. Modern faucets are more efficient, and some come with advanced features for convenience and ease of use. Besides that, modern faucets are designed to conserve water, thereby reducing your water bill significantly.
Other reasons for replacing a faucet include leakages, corroded inner parts, and visible damage.
How to extend the life of your faucet
A regular quality faucet can last up to 10 years if it is properly maintained. Some high-tech faucets last even longer.
It all comes down to how well you maintain your faucet. If you notice leaks, repairing them immediately can help prevent further damage. You might also want to consider installing a water softener if you are dealing with hard water. The softener can help eliminate minerals that can damage your faucet.
Also, be smart when buying a faucet when it comes to a warranty. Not all faucets come with a lifetime warranty. If you buy one with a limited warranty, at some point, you will need to purchase replacement parts.
If you buy cheap parts, that may lead to problems. In other words, consider getting a faucet that comes with a lifetime warranty as you’ll always be assured that you are getting quality parts.
Conclusion
It is not difficult to maintain a faucet. Regular cleaning and fixing faucet issues promptly can help extend the life of your fixture. Some people tend to ignore certain problems like a leaky faucet and end up having to replace the entire faucet.
You can save money by inspecting your faucet regularly for leaks and corrosion and fixing these problems quickly. Keep in mind that doing this can also save you money on your water bill.