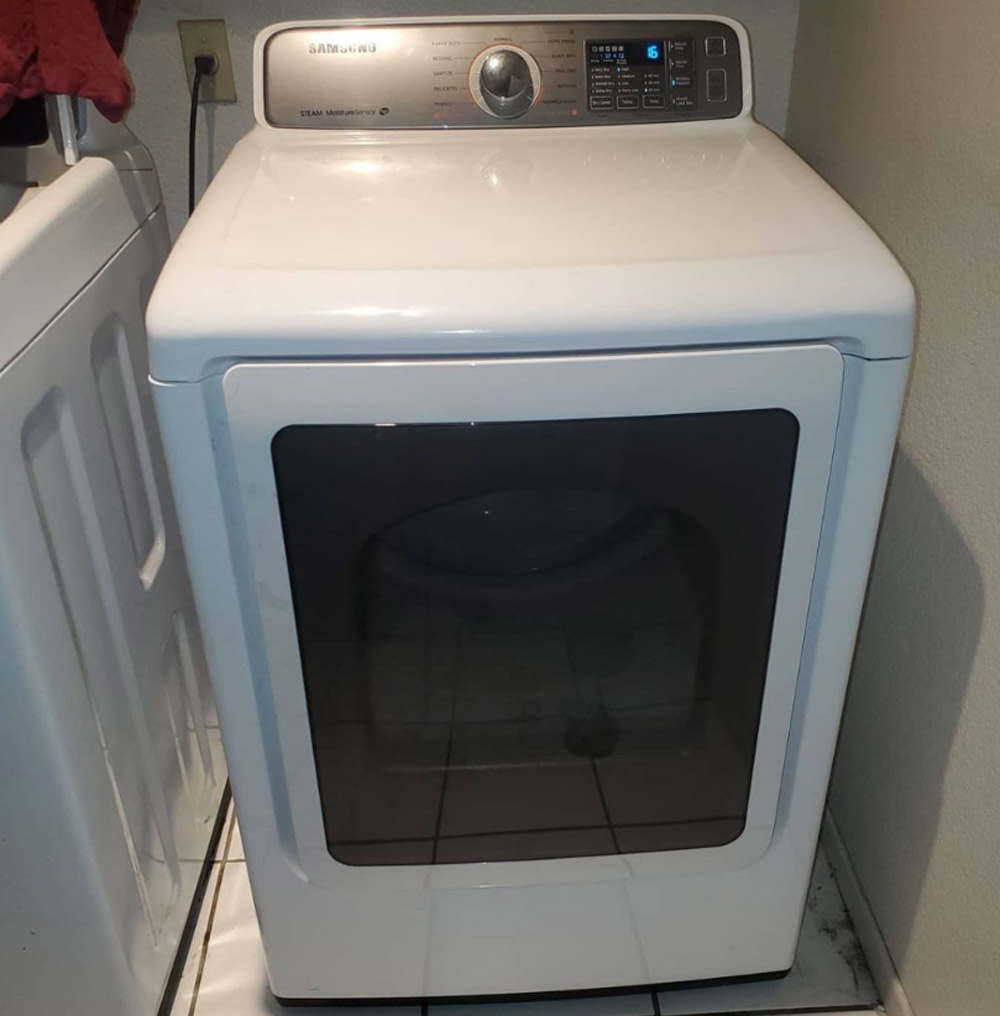
Changing the heating element in your Samsung dryer is no easy task. It’s a process that requires patience and determination to complete, but it can be done!
The instructions in this blog post will show you how to change your Samsung dryer’s heating element. This is a job that just about anyone can do with the right tools. The instructions are in step-by-step format and include pictures so that you don’t get lost along the way.
How does the heating element in a Samsung dryer work?

The heating element in a Samsung dryer is responsible for the heat that dries your clothes. It’s a metal coil that gets hot and helps to evaporate the water from your clothes. When this element goes out, your dryer will no longer be able to produce heat and will not be able to dry your clothes.
If you’re experiencing these problems with your dryer, it may be time to change the heating element. Luckily, this job is simple enough that most people can do it themselves without having to hire a professional. Just follow the steps in this blog post and you’ll be good to go!
Why did the heating element on my Samsung dryer go bad?

There are a few different reasons why the heating element in your Samsung dryer may need to be replaced.
The most common reason for replacing this part is because it has gone bad and will not produce heat anymore. This happens when too much time passes by between uses of your dryer or if you overload it with clothes at once, which can cause damage to the heating elements.
Another common problem among Samsung dryers is that they suddenly stop working altogether after years of normal use. If this happens, then chances are there’s something wrong with one (or more) of its components and needs to be fixed before being used again. In these cases, the heating element will often have been damaged from overheating or from foreign objects getting stuck inside.
How to change the heating element in a dryer?
Samsung dryers have one common issue – the heating elements usually go out after some time. If you’re experiencing problems with your dryer not drying clothes or if it’s stopped working altogether, it may be time to replace the heating element. The good news is that this is a task most people can do themselves without having to hire someone to do it.
The entire process of changing your heating element will only take about an hour or two, which is significantly shorter than the time you’d have to wait for a repairman.
The instructions in this blog post are specifically for Samsung dryers but they can be modified slightly if necessary so that they work with other types of appliances as well.
Just follow these easy steps and you’ll be enjoying perfectly dried clothes again soon!
Safety first
When working with any type of appliance, it’s always important to take some safety precautions. Here are a few tips to keep in mind when changing your heating element:
- Make sure the dryer is unplugged from the mains supply before beginning any repairs.
- Do not try to remove or replace the heating element while the dryer is turned on.
- Be very careful when handling sharp objects like screws and blades.
- If you’re unsure about how to complete a task, stop and consult an expert before continuing.
Following these simple tips will help ensure that your repair goes smoothly without any accidents! Now let’s get started…
Unplug the dryer from the mains supply
The first step in changing your heating element is to unplug the dryer from the main supply. This will ensure that there’s no risk of electrical shock while you’re working on it. Do this by pulling on the plug to remove it completely and check that there is no power running through any of its wires or components before continuing with your project.
If you have a circuit tester available, use it to double-check that everything is off. You can buy one at most hardware stores for just a few dollars if you don’t already own one yourself – they’re an invaluable tool when doing electrical work!
To avoid accidents while working on your appliance, always remember to turn things off before beginning repairs like these so that electricity doesn’t cause problems for you later down the road.
Take off dryer exhaust hose
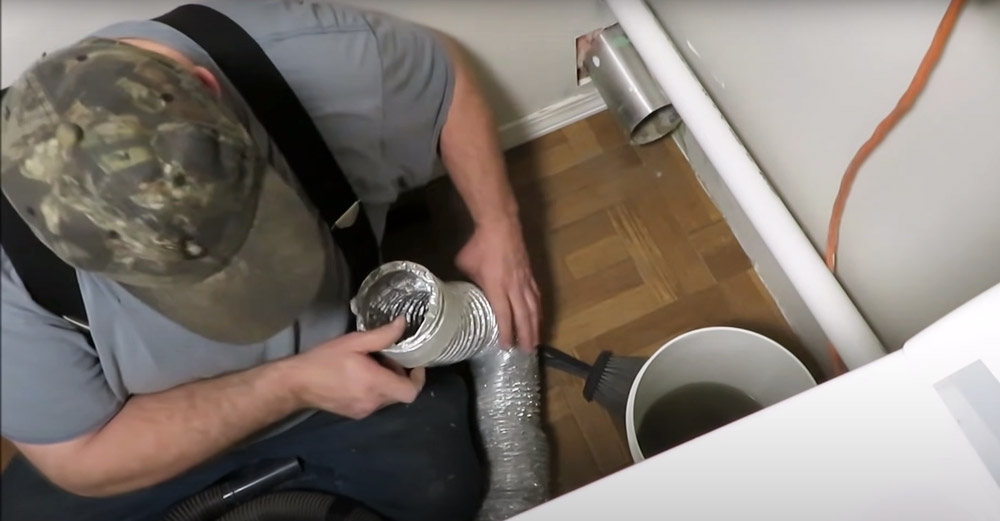
The next step is to take off the dryer exhaust hose. This will give you easier access to the heating element and make it less likely for any dirt or lint to get inside while you’re working on it. To do this, remove the clamp that holds the hose in place with a screwdriver then pull it straight off. You may need to wiggle it a bit until it comes loose.
If there’s any dust or debris caught inside, use a vacuum cleaner to clean it out before continuing.
Now would also be a good time to check your dryer vent and make sure that there’s no obstruction blocking its path – if there is, clear it away before using your dryer again. A blocked vent can cause all sorts of problems from reduced efficiency to worse ones like a fire hazard.
Remove the screws on the back of the dryer and remove the back panel
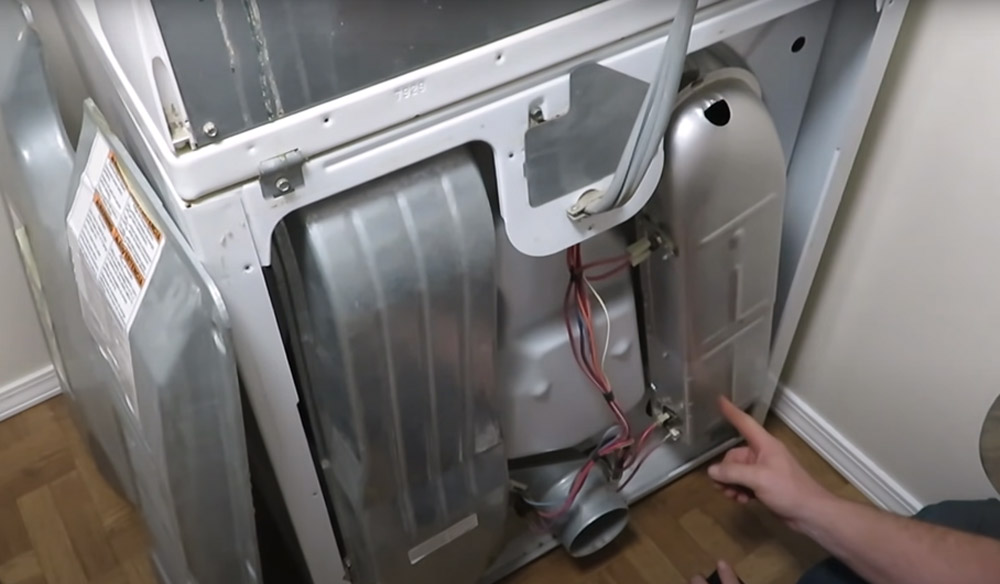
The next step is to remove the screws on the back of the dryer and remove the back panel. This will give you access to the heating element so that you can replace it. There are usually between six and eight screws in total, so use a screwdriver to remove them all. Once they’re gone, gently pull on the back panel until it comes loose and set it aside. Be very careful when doing this so you don’t damage any of the wiring or cables behind it.
Make sure to keep track of all the screws and other small parts that come off the dryer during this process – they can easily get lost if not kept together in one place.
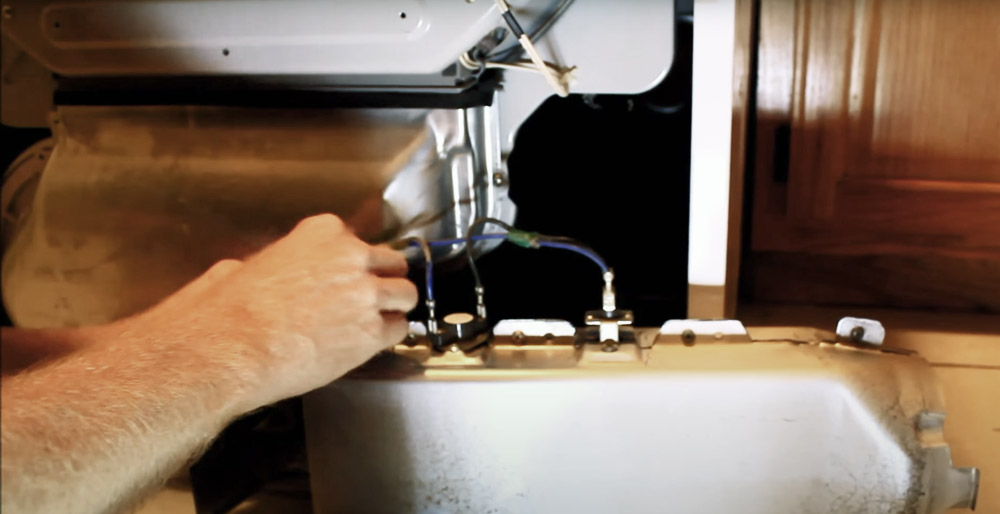
Remove the control panel
The next step is to remove the control panel. To do this, unscrew the four screws that hold it in place with a screwdriver then pull it straight off. Again, be very careful when doing this so you don’t damage any of the wiring or cables behind it.
Once it’s off, you should see the heating element right in front of you. It’s usually located in the lower-right corner of the dryer and is held in place by two screws. Use a screwdriver to remove them both then gently pull on the heating element until it comes loose from its socket.
Open the dryer door and remove 2 more screws at the base of the door
The next step is to open the dryer door and remove two more screws at the base of the door. These will be a little bit trickier, so make sure you have a screwdriver with an appropriately sized head before going anywhere near them.
Remove the front panel
Gently pull on the front panel until it comes loose from its clips then carefully lay it down flat.
You can also use your vacuum cleaner or compressed air to clean out any dirt that might’ve gotten trapped inside while working on your appliance.
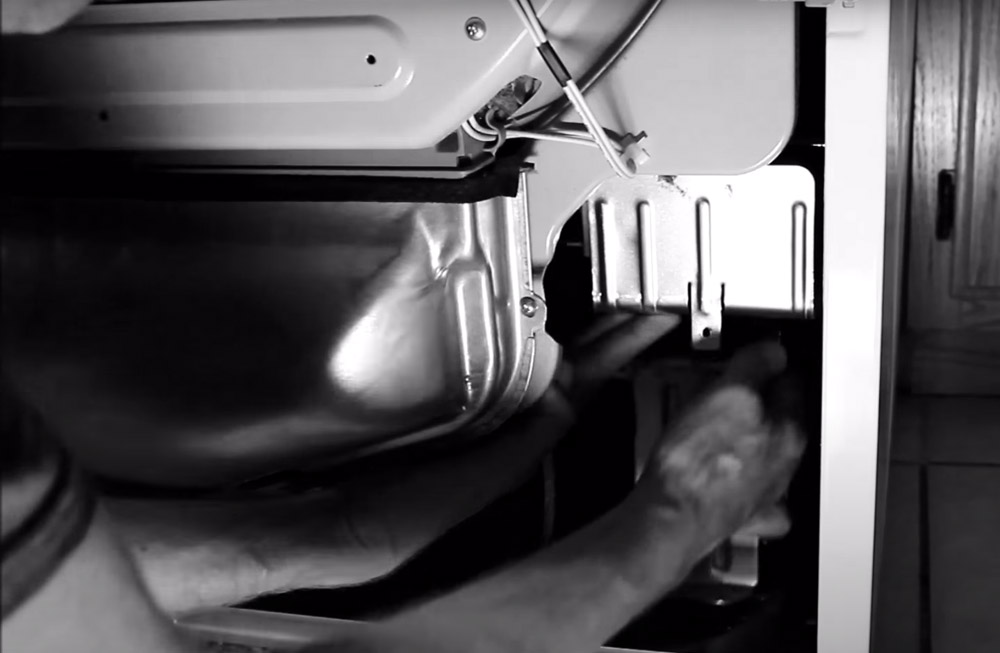
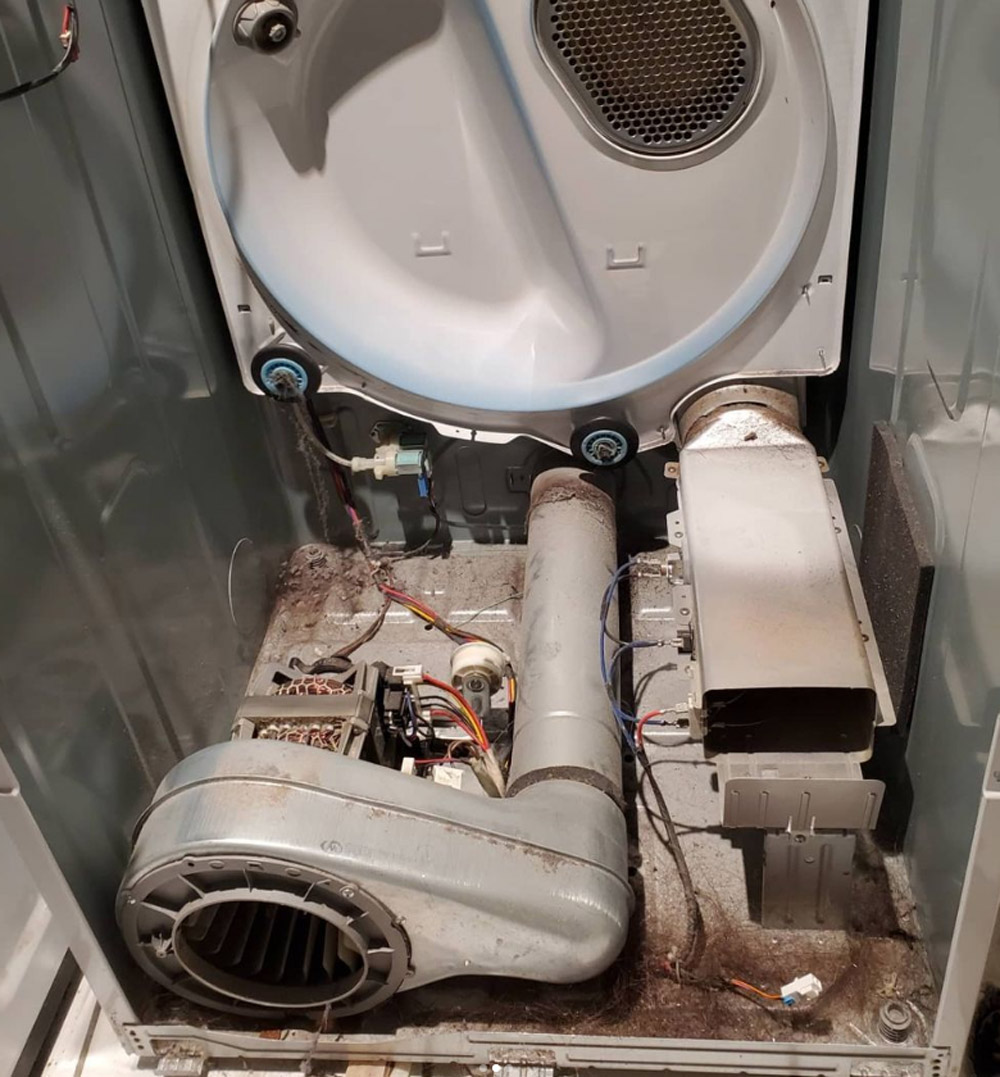
Remove the mounting bracket
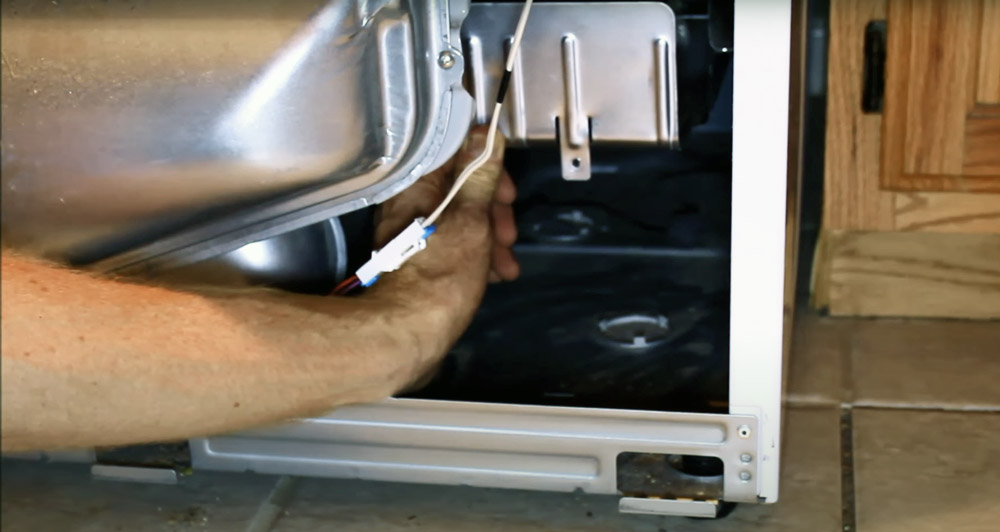
The next step is to remove the mounting bracket. To do this, use a screwdriver to loosen the screws that hold it in place then pull it off. Once it’s removed, you should be able to see the heating element in all its glory.
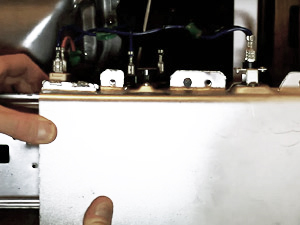
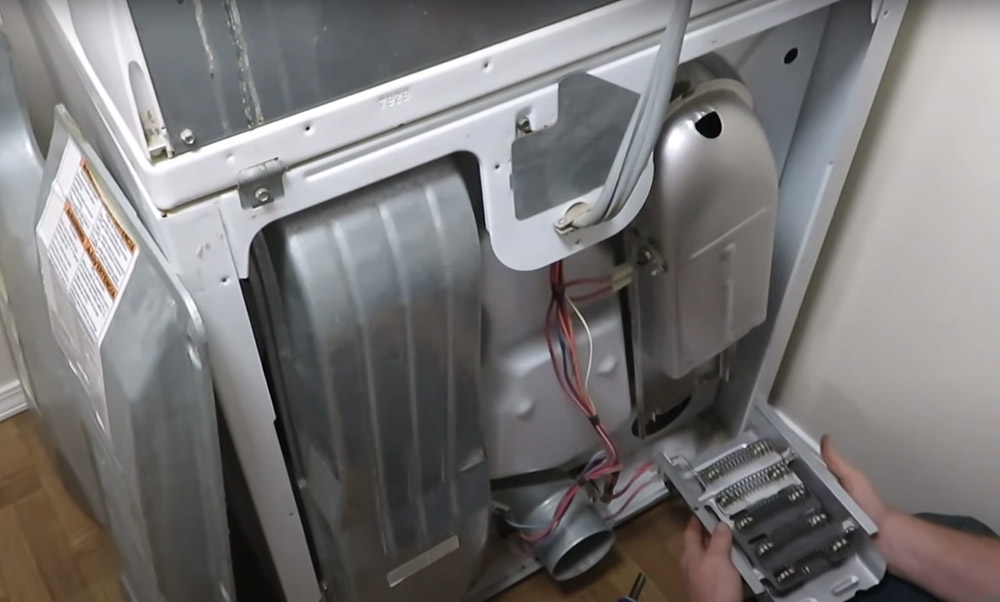
Pull heating element housing out of the dryer
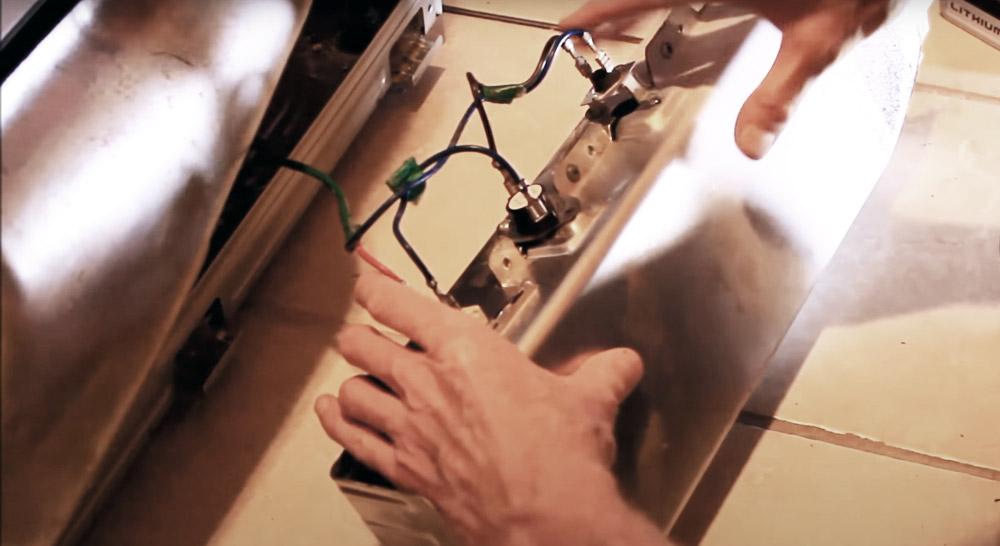
Now it’s time to remove the heating element housing. This is held in place by two screws, so use a screwdriver to remove them both then gently pull on the housing until it comes loose from its socket.
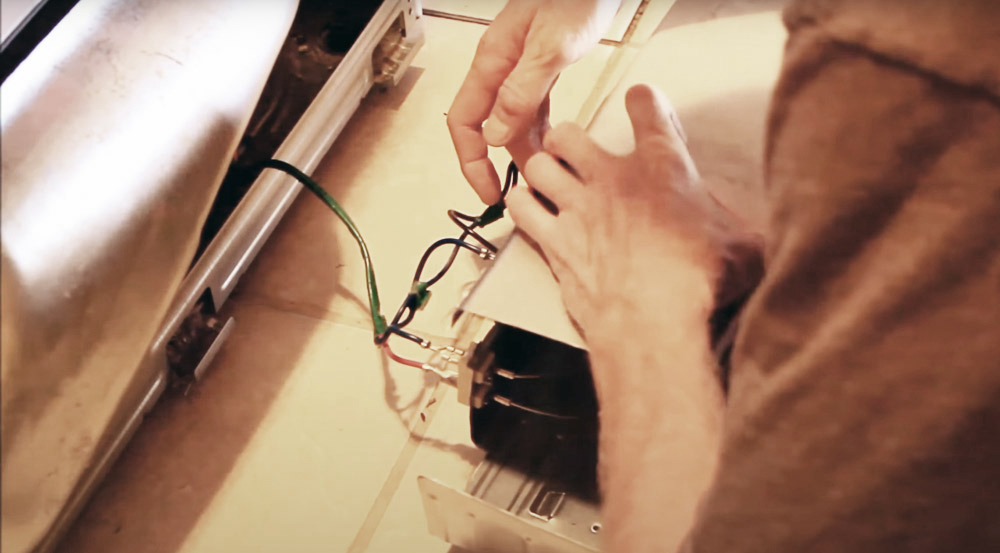
If you’re replacing the heating element, make sure to take a note of how it’s oriented before disconnecting it – there might be some markings on the socket or housing that will help you remember later.
Replace the faulty heating element with the new heating element and put everything back together using this guide in reverse
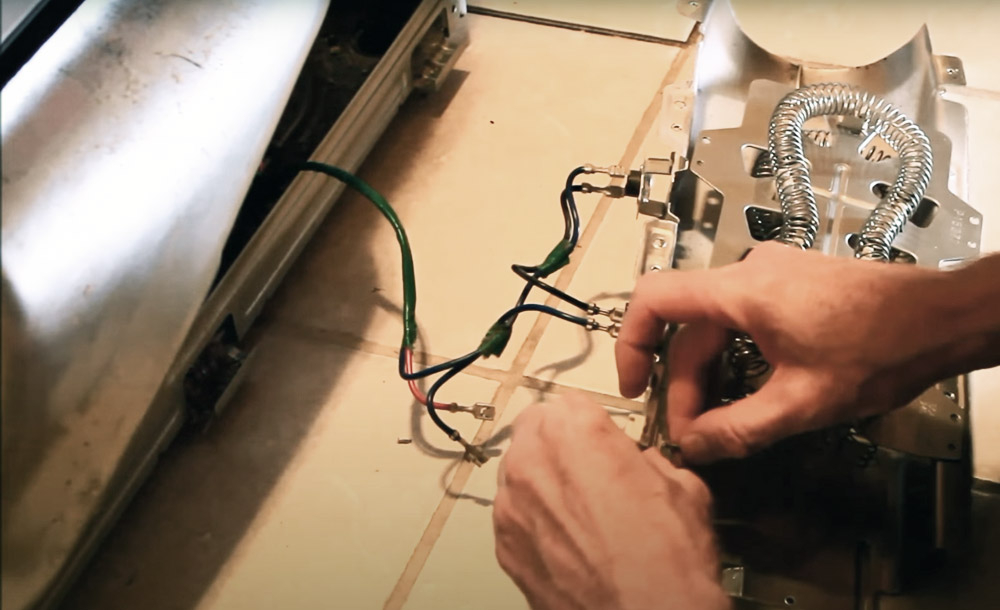
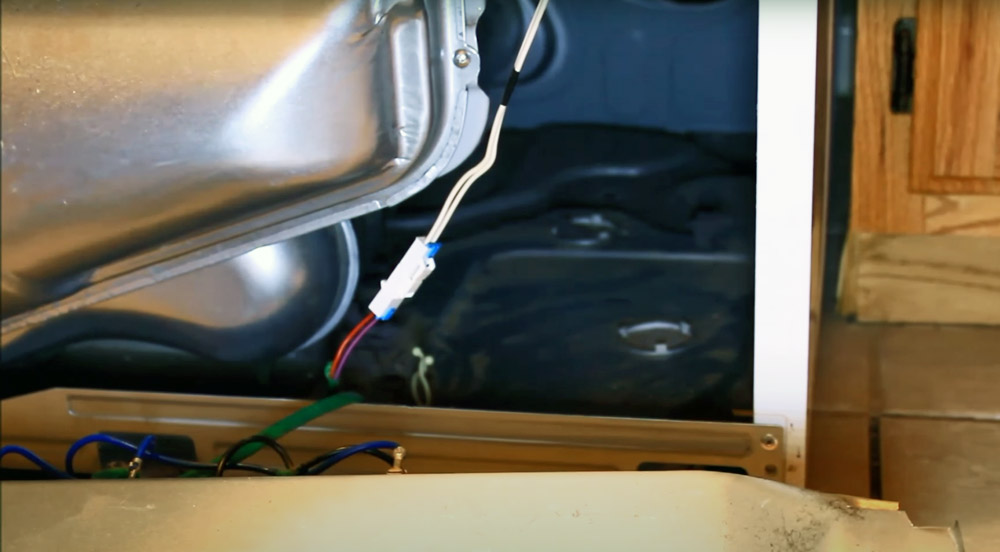
Replace the faulty heating element with the new one. Once you have the new heating element, insert it into the socket then reattach everything that came off in reverse order of how you took it apart – remember to be very careful when handling small parts like screws and wire nuts as they’re easily lost if dropped.
Make sure any cables are tucked away neatly before putting anything back together too – this will help prevent them from getting damaged or pinched accidentally now or later on down the line. If there’s a large amount of lint built up inside your dryer, now would also be an excellent time to clean it out with some compressed air before reconnecting power again.
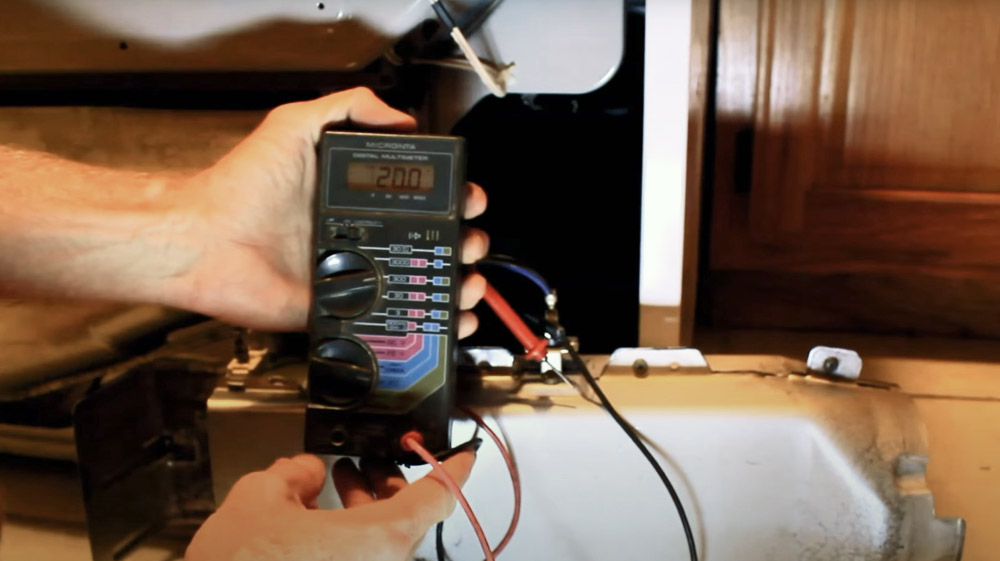
Testing your dryer
Once you’ve put everything back together, test your dryer for proper operation before putting everything back in its place. If the heating element doesn’t heat up, it could be a sign that something went wrong during your repair or that you’ve missed out on one of the steps above – double-check all connections and wiring to make sure they’re secure before calling for professional help if needed.
If everything is working fine after testing, put your dryer’s front panel back on by inserting the clips at each corner then screwing them into place with a small flathead screwdriver. Make sure not to overtighten them as this can damage the plastic used for making these panels. Once done, go ahead and reattach all four screws that hold your control panel in place then close it back onto its mounting bracket before replacing both at the front of your dryer.
Once all these are back in place, the only thing left to do is put your control panel and door back where they belong – make sure you don’t overtighten any screws as we already mentioned earlier; doing this can damage some of the components inside and possibly render them unusable. Once everything’s secure, test out your Samsung dryer once more before putting it back into its original position.
Assuming everything goes well, your dryer will be up and running like new in no time! Congratulations on a job well done. ????
What else can cause my Samsung dryer to not heat?
There are a few other things that can cause your Samsung dryer to not heat. One of the more common problems is a bad thermostat, which will need to be replaced if it’s determined to be the root of the issue.
Other potential culprits include a broken belt, a clogged lint filter, or an overloaded machine. If you’ve checked all of these and ruled them out as potential causes then it might be time to call in for some professional help.
How do you know if the heating element is bad in a dryer?
If your clothes aren’t drying and you suspect that the heating element might be bad in a dryer, there are several signs to look out for. If it seems like there’s no heat at all while using the machine, then this is probably what’s going on with yours.
Another sign of a faulty heating element is if only one side or corner of the drum heats up when running it – if so, then this could indicate an issue with either your thermostat or thermal fuse depending on where exactly they’re located inside your appliance.
Did You Know? Heating elements can also burn out over time just from everyday use! This will cause them to have shorter life spans than usual which means replacing them more often – regular maintenance should take care of most small issues before they turn into bigger ones though.
If you’re still not sure whether or not the heating element is bad in your dryer, it’s always best to consult with a professional. They’ll be able to diagnose the problem and provide you with the necessary repairs – so don’t hesitate to reach out if you think something might be wrong!
Conclusion
If your Samsung dryer isn’t heating up as it should be, don’t worry – you’re not alone. This is a common problem, especially among newer models, and it’s usually something that can be fixed without too much trouble. All you need is a screwdriver, some basic knowledge of how your dryer works, and these simple instructions!
That’s pretty much it! Even if this looks like a complicated process at first sight, with our help things should go smoothly without too many complications along the way (provided you follow our instructions carefully).
