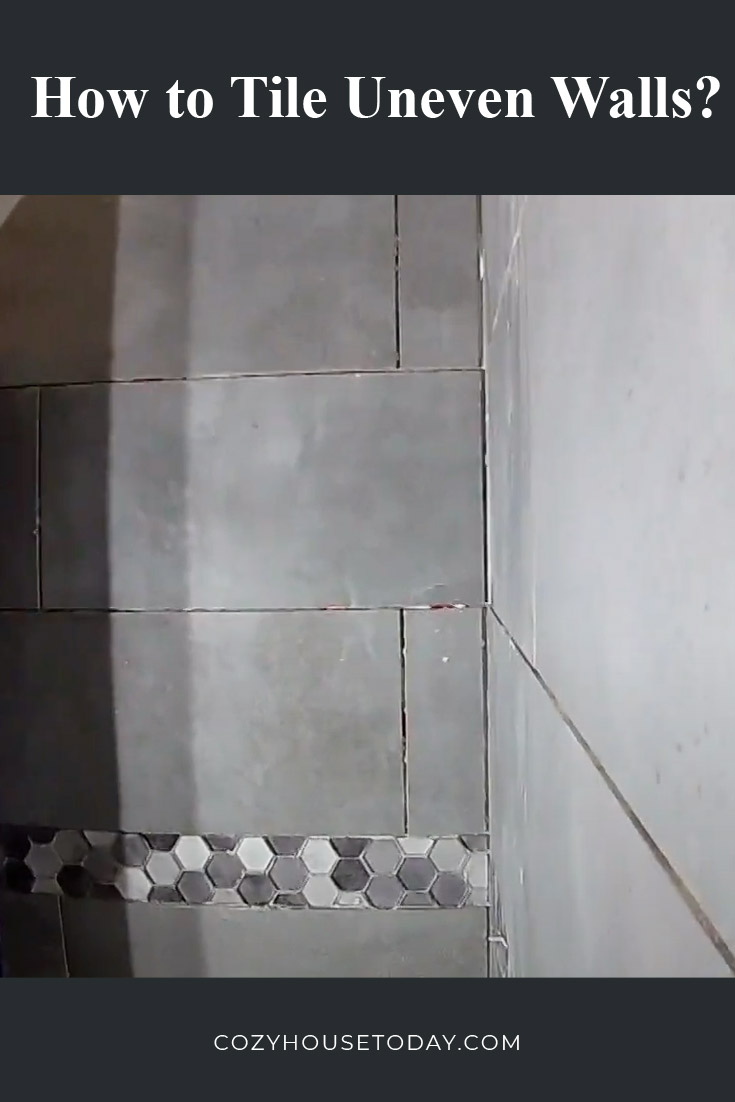
Have you ever found yourself in a situation where you have to tile an uneven wall, but don’t know how? It’s not always easy to do. You can’t just use any old tiles and expect them to stay up on the wall. This article will show you some tips and tricks for tiling an uneven wall so that it looks great!
Things you will need
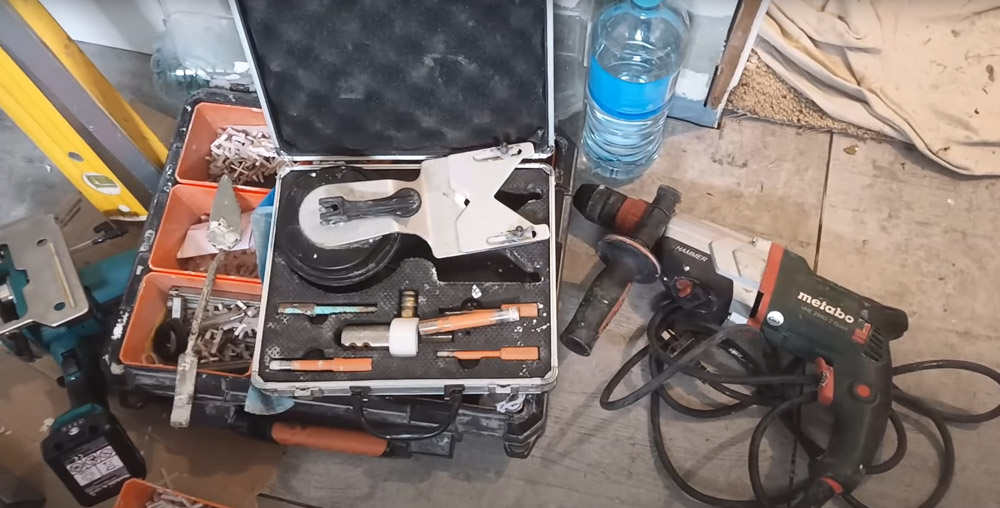
- The right tools to do the job properly. If you don’t have them, then try borrowing from friends or family members who might be able to loan something out for your project. It’s best if they are not used because you want everything to look nice and new when done with the tiling process!
- Chisel and hammer
- Mortar / Tile adhesive for uneven walls. If you want to make sure that the tiles will stick on your wall, then the mortar is what you need. You can’t just use any old glue and expect it to hold up. You need a high-quality tile adhesive for this job!
- Tiles of different sizes and shapes
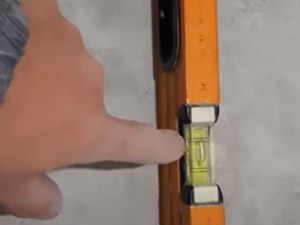
- A leveler tool (If your tiles are in a specific design)
- Grout/Caulk
How to prepare an uneven wall for tiling?
Measuring and cleaning the walls

The first step is to measure the wall that you are going to tile. Once you have a rough estimate on how big your tiles will be, start cleaning up any excess dirt or grime from the walls so they can get a good clean before applying adhesive and placing down the tiles.
If there’s already paint on it, then make sure you sand down all of those areas with an electric sander until smooth again.
Use a chisel and hammer if you need to remove existing tiles
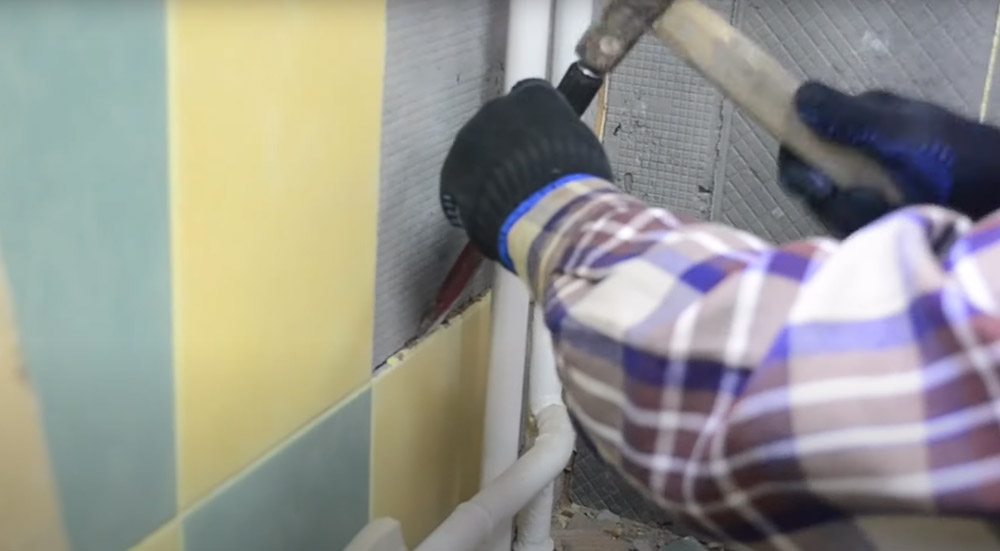
If you need to remove any existing tiles, then use a chisel and hammer or an electric drill fitted with a masonry bit. If this is done carefully without breaking the newly tiled wall, it will be easier for you when trying to layout your new tile design!
Fill any cracks or holes in the wall with spackle
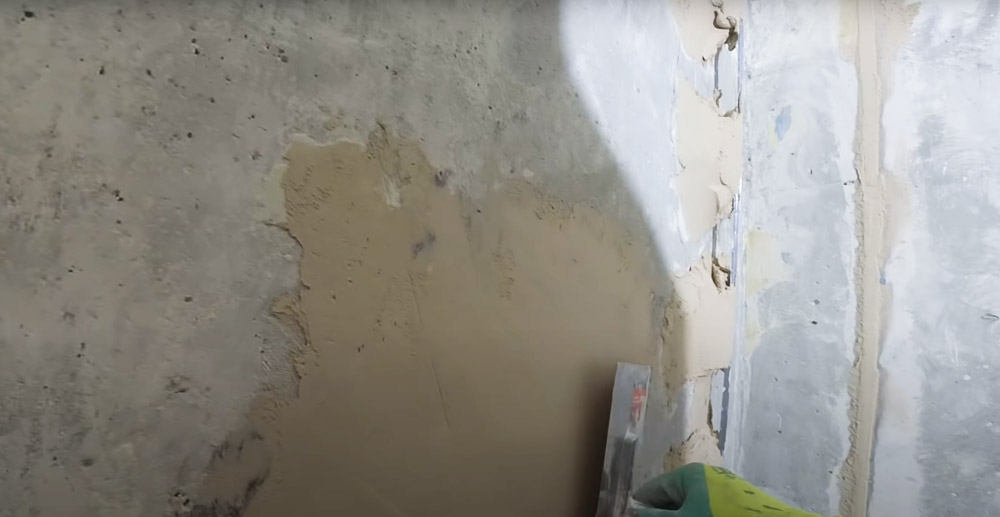
If there are any cracks or holes in the uneven wall, then use the spackling compound after scraping off as much loose debris as possible from inside the crevices where needed! Just make sure that when using this stuff that you don’t cause too much excess onto an area that is already flat!
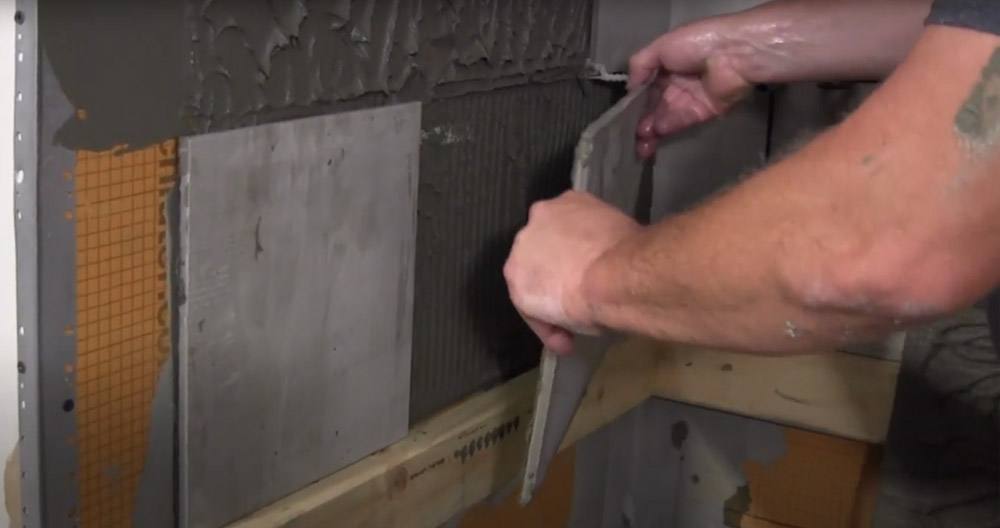
Level those uneven walls
Once everything has been measured, cleaned up, and filled in where needed You can start putting down adhesive on the uneven walls so that they are ready for laying down some tiles later on!
The gap should be filled up entirely until no more empty space remains present at all.
There should be enough mortar/adhesive mix left over after covering all of the areas which have already had their paint removed because not every area needs it. However, if there’s too much leftover mixture, just store it in airtight zip locks bags in case you need more at another time
In order for your mortar/adhesive mix to stick properly without having too many problems later on you need a flat surface free of debris. If you want to make sure it will stick then be careful of what kind of tools are used on the surface so that nothing can alter how well they hold up!
If done correctly though, your walls will end up looking brand new again with smooth surfaces everywhere where needed!
Backer boards
If there are areas on the wall that still don’t seem to want to stay up, then laying down some backer boards can help with this. To do so, you will need a straight board (or two) like the ones used for carpentry projects and lay it across those troublesome spots which could use more support!
Once all of your backer boards have been properly secured in place without shifting or moving out of place, fill in any gaps between boards with some mortar/adhesive mixture so they stay nice and secure without having to worry about them shifting around too much when someone walks on top of these areas or puts pressure onto them.
You should now have a free-standing wall that has even space everywhere were needed for laying down your new tile design!
Use drywall
If there is still some uneven space between the new backer boards and your old tile surface, then you can use drywall mud to even everything out. Just apply it carefully in small amounts until no more empty spaces remain present where needed! Be careful of any areas that have a thinner consistency because it might end up falling off onto other parts which don’t need this mixture near them at all!
Carefully remove excess material anywhere on t tiles look brand new again after getting covered up by some nice looking ones but no more accidents or injuries will occur in certain places either which makes everyone happy! Don’t worry if you accidentally get some over on certain spots though since they can be removed later on when someone cleans up your work area from messy clutter again.
Deciding on a design your tile
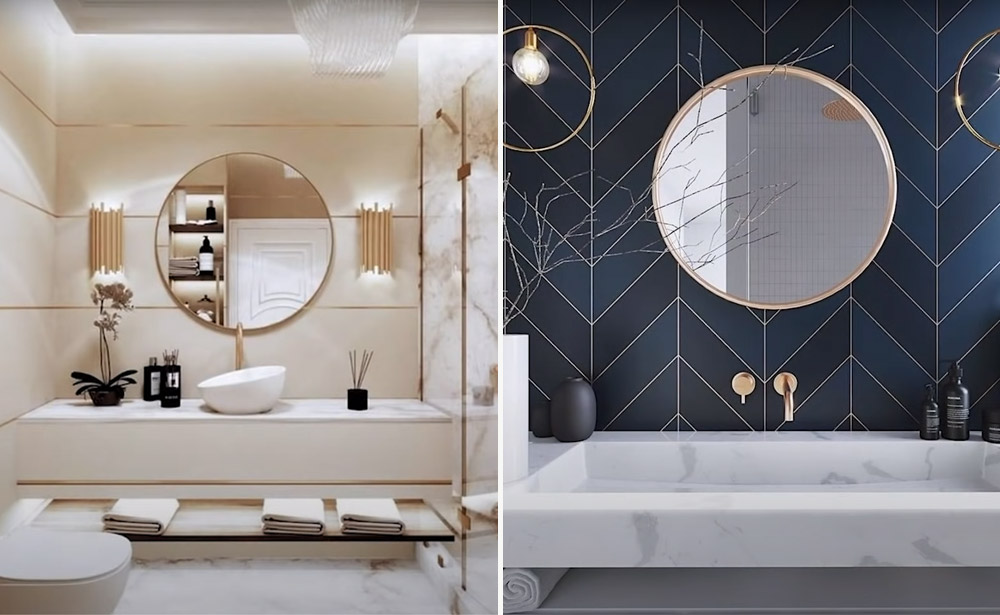
Now that you have a smooth surface, it’s time to decide on what kind of design you want! There are many different designs and styles available for purchase as well as custom options if there is nothing out there that fits your personality or tastes. You can even use some leftover paint from before the project began in order to create new patterns since they were just sitting around anyway after doing touch-ups here and there during this process.
Your imagination is the only thing holding back how nice your tiles will look once laid down so feel free to try anything at all until something comes together with ease! Don’t be afraid of trying things either because making mistakes along the way doesn’t matter too much when everything was already messed up anyhow so no big deal if you have to redo a few things here and there from time to time.
Once you are sure that everything is exactly where it needs to be, then you can start laying down your design. A great idea for making this process easier would be finding some kind of stencil that gives enough space for cutting around the edges so no messy excess material gets onto places unintended!
If you don’t have a stencil already lying around or need more than one at once, then try looking up how to make them yourself because there are plenty of tutorials available online these days on how to do just that!
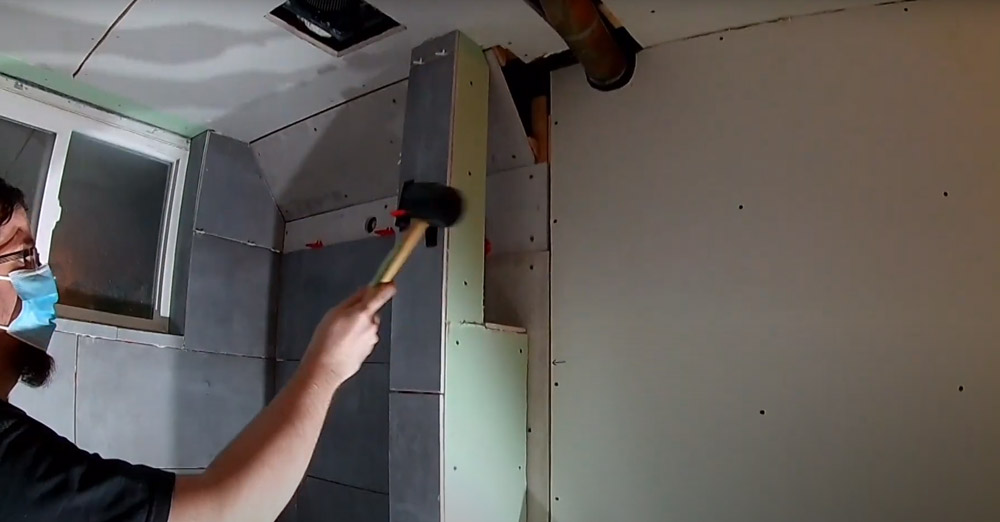
Hanging your tile
Once everything has dried out completely after about 24 hours depending on how quickly the adhesive dries, you can now start tiling over the already dry mortar/adhesive mixture and get started with your new tile design!
- The first thing that you want to do is measure out your tiles so that they will fit on your wall without any issues when tiling an uneven wall. If there are specific patterns or designs in the tile then make sure that they aren’t too close together because it could interfere with how well everything goes onto the wall.
- Once you have measured out all of your tiles properly, lay them down on the floor where you plan to place them once finished installing them onto the walls. This way if something doesn’t fit right (like a side piece) then you can easily adjust it before you start to put them onto the wall.
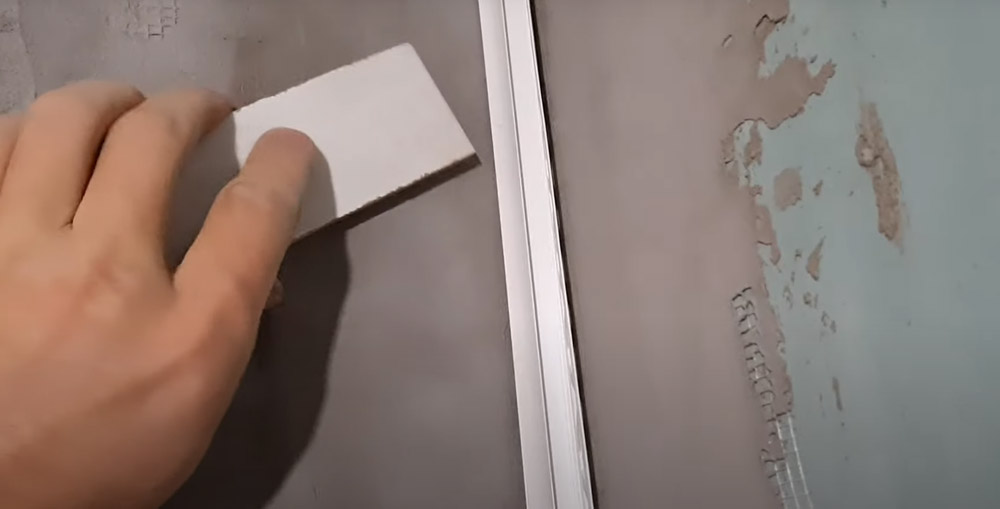
- Next, once everything fits on your floor as it should then take a leveler tool and place it against each tile that will go onto the wall. If anything is off by even one millimeter, then make sure to adjust those tiles so they are straight before starting this process! This step might seem tedious but trust me when I say that it’s worth taking care of now or else you’ll have a pretty difficult time later on if any of these tiles aren’t lined up perfectly right from the very beginning.
It’s actually not too difficult, especially when using some tools like a leveler tool which will help make everything nice, and even so, no area looks higher than any other section nearby!
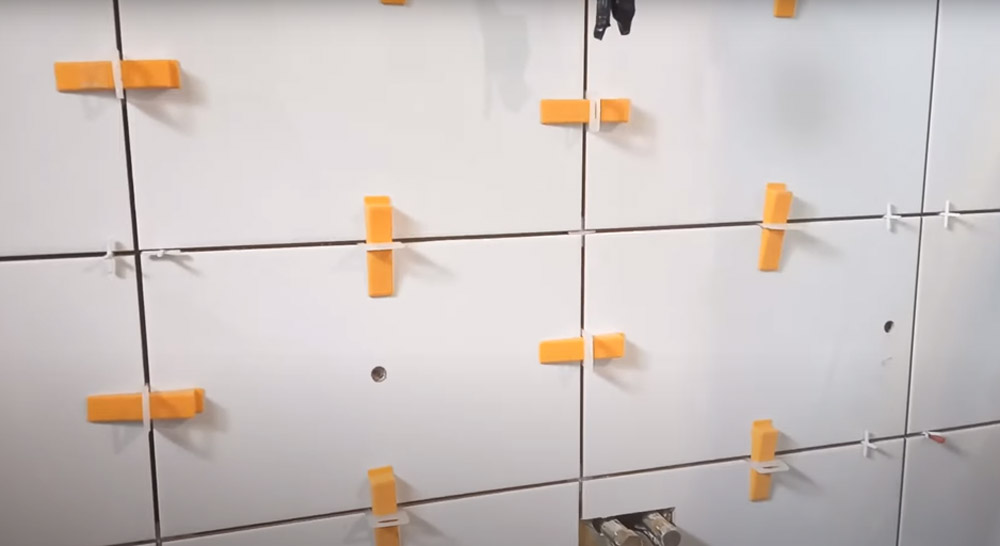
Now that you have a nice and even surface, it’s time to start using different tile sizes & shapes so they can fit together perfectly all throughout your wall! You might need to use some spacers. They look like small plastic rectangles with circles on them which should be placed against each side of any gap between two adjacent tiles.
The size of the spaces will vary depending upon how big or small those areas are but typically shouldn’t go over half an inch (a little less than one centimeter).
Applying Grout to the Tile
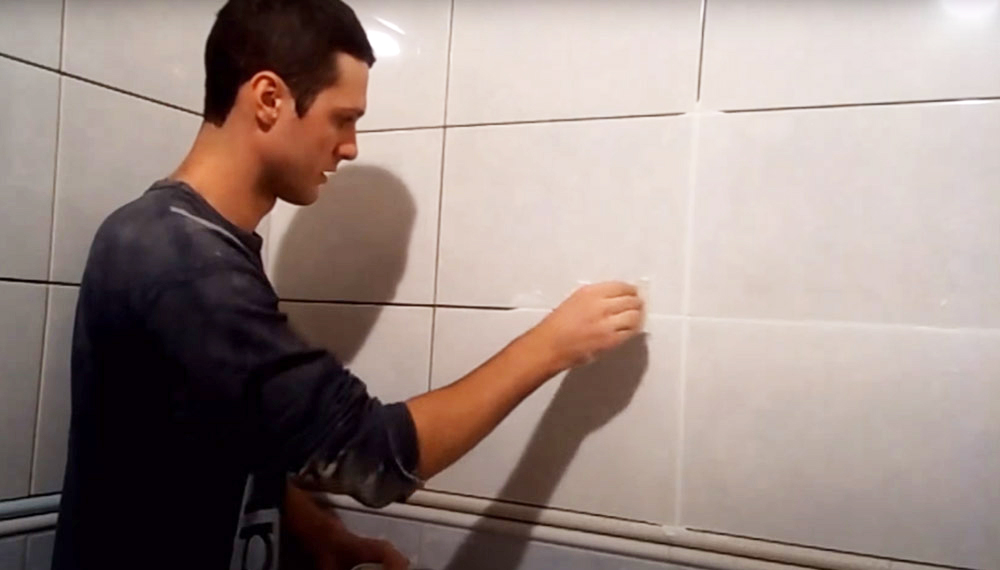
Also, don’t forget to use grout or caulk in between each set of tiles were needed for an extra professional look once done! Pon the wall with a nice and even layer of grout, then use an old sponge to wipe away the excess. Make sure that there is enough space for your tiles all throughout your wall because you don’t want any accidents happening when trying to fix it later on!
Conclusion
Just remember that good preparation is always worth doing before attempting anything new because even just one small mistake can ruin everything for your final results if care isn’t taken into consideration beforehand. If done right though, not only will your old walls look brand new again with the tiles, but also this is a great way to be more creative and make something awesome for your home!